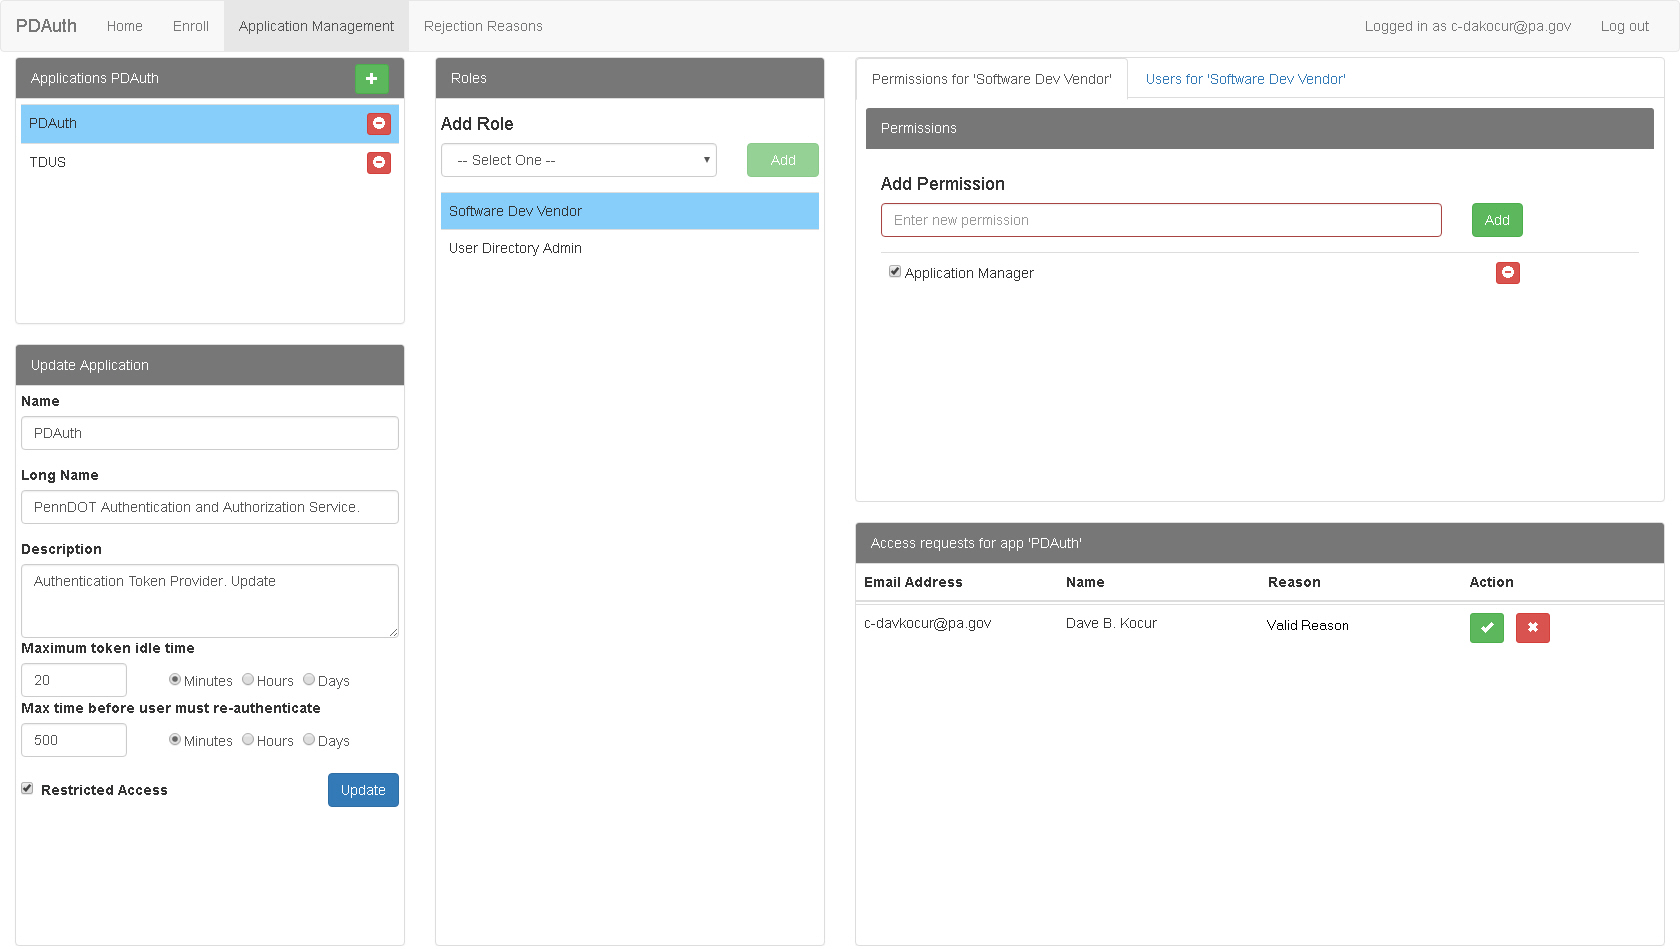
The Application Management Page appears when you click Application Management on the PDAuth Menu Bar. It contains controls for modifying Application settings and roles, as well as for approving/rejecting access requests and assigning roles to users.
The Application Management page contains the following areas:
· Roles
The Applications area contains a list of applications PDAuth is used for.
Click an application name to select it.
The Update Application area contains controls for modifying the selected application's settings.
Name - The name of the application as it appears in the Applications list.
Long Name - The full name of the application.
Description - Provides a brief outline of the application and its functions.
Maximum token idle time - Enter the amount of time a session is idle before the user is logged out and select the appropriate radio button for units of measure.
· Minutes
· Hours
· Days
Max time before user must re-authenticate - Enter the amount of time until a user must log in again and select the appropriate radio button for units of measure.
· Minutes
· Hours
· Days
Restricted Access - Click this checkbox to indicate restricted access.
Update - Click this button to save the changes made to the application's settings.
The Roles area contains controls used for adding or modifying roles for the applications.
It contains a list of all roles for the selected application.
Add Role - Click to add a new role to the application. A text box appears for you to enter a name for the role.
Add - Click this button to add the role to the list.
This area contains two tabs:
· Permissions for [ROLE]
· Users for [ROLE]
Use this tab to modify permission for the selected role.
It contains a list of all permissions for the selected role.
Add Permission - Click to add a new permission to the role. A text box appears for you to enter a name for the permission.
Add - Click this button to add the permission to the list.
 Remove - Click this button to remove the permission from the list.
Use this tab to assign users the selected role.
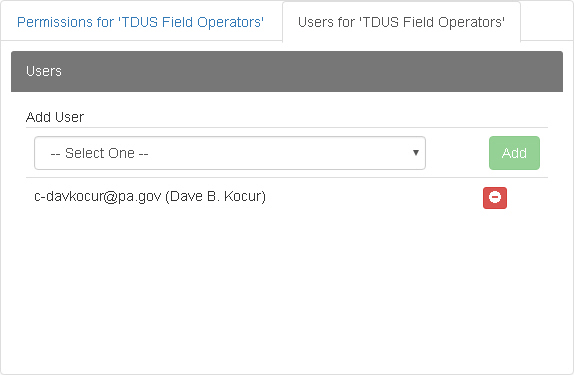
Add User - Select a user from the drop down list.
Add - Click this button to assign the role to the selected user.
Remove - Click this button to remove the role from the selected user.
This area contain controls for approving or rejecting access requests.
Email Address - Displays the email address associated with the account.
Name - Displays the name of the user making the access request.
Reason - Displays the user provided reason for access.
Action - Displays two buttons for each access request. An email will be sent to the user indicating approval or rejection.
· Approve - Click this button to approve the access request.
· Reject - Click this button to reject the access request. You will be asked to provide a rejection reason.